
ruby-2.4.1をソースからビルド(RHEL4)
zlibが入ってない場合は、zlibのサイト
https://zlib.net/
から、zlibをダウンロードする。
# tar -zxvf zlib-1.2.11.tar.gz
# cd zlib-1.2.11
# ./configure
# make
# make install
rubyのダウンロードサイト
https://www.ruby-lang.org/ja/downloads/
から、rubyをダウンロードする。
解凍
# tar -zxvf ruby-2.4.1.tar.gz
コンパイル
# cd ruby-2.4.1
#./configure –prefix=/usr/local/ruby
# make
インストール
# sudo make install
rubyのパスを通す
$ export PATH=/usr/local/ruby/bin:$PATH
$ ruby -v
ruby 2.4.1p111 (2017-03-22 revision 58053) [i686-linux]
rubygemsをインストールします。
rubygemsのサイト
https://rubygems.org/
から、ソースをダウンロード
# tar -zxvf rubygems-2.6.13.tgz
# cd rubygems-2.6.13
# ruby setup.rb
——————————————————————————
RubyGems installed the following executables:
/usr/local/ruby/bin/gem
Ruby Interactive (ri) documentation was installed. ri is kind of like man
pages for ruby libraries. You may access it like this:
ri Classname
ri Classname.class_method
ri Classname#instance_method
If you do not wish to install this documentation in the future, use the
–no-document flag, or set it as the default in your ~/.gemrc file. See
‘gem help env’ for details.
続いて、rakeのインストール
# gem install rake
ERROR: While executing gem … (Gem::Exception)
Unable to require openssl, install OpenSSL and rebuild ruby (preferred) or use non-HTTPS sources
エラー発生。
# cd /usr/local/src/ruby-2.4.1/ext/openssl
Makefileのtopdirの下に下記1行を追加する。
top_srcdir = /usr/local/src/ruby-2.4.1
# ruby extconf.rb
checking for t_open() in -lnsl… no
checking for socket() in -lsocket… no
checking for openssl/ssl.h… yes
checking for OpenSSL version is 0.9.8 or later… no
extconf.rb:60:in `
バージョンを確認すると、
# openssl version
OpenSSL 0.9.7a Feb 19 2003
opensslのサイト
https://www.openssl.org/source/
から、ソースをダウンロードする。
解凍
# tar -zxvf openssl-1.0.2l.tar.gz
コンパイル
# cd openssl-1.0.2l
# ./config -fPIC shared
# make
インストール
# make install
openssl-1.0.2lをライブラリパスに追加する。
/etc/ld.so.confにライブラリを追加する。
/usr/local/ssl/lib ←追加
include ld.so.conf.d/*.conf
設定反映
# ldconfig
反映確認
# ldconfig -p | grep ssl
libssl3.so (libc6) => /usr/lib/libssl3.so
libssl.so.4 (libc6) => /lib/libssl.so.4
libssl.so.1.0.0 (libc6) => /usr/local/ssl/lib/libssl.so.1.0.0
libssl.so (libc6) => /usr/local/ssl/lib/libssl.so
libssl.so (libc6) => /usr/lib/libssl.so
libcrypto.so.1.0.0 (libc6) => /usr/local/ssl/lib/libcrypto.so.1.0.0
libcrypto.so (libc6) => /usr/local/ssl/lib/libcrypto.so
バージョン確認
# /usr/local/ssl/bin/openssl version
OpenSSL 1.0.2l 25 May 2017
パスを通す
# export PATH=/usr/local/ssl/bin:$PATH
rubyをリコンパイル&インストール
# cd /usr/local/src/ruby-2.4.1
# ./configure –prefix=/usr/local/ruby –with-opt-dir=/usr/local/ssl –enable-shared
# make
# make install
改めて、rakeをインストール
# gem install rake
Successfully installed rake-12.0.0
Parsing documentation for rake-12.0.0
Installing ri documentation for rake-12.0.0
Done installing documentation for rake after 1 seconds
1 gem installed
# gem install reils
・・・
Parsing documentation for sprockets-rails-3.2.1
Installing ri documentation for sprockets-rails-3.2.1
Parsing documentation for rails-5.1.4
Installing ri documentation for rails-5.1.4
Done installing documentation for i18n, thread_safe, tzinfo, concurrent-ruby, activesupport, rack, rack-test, mini_portile2, nokogiri, loofah, rails-html-sanitizer, rails-dom-testing, builder, erubi, actionview, actionpack, activemodel, arel, activerecord, globalid, activejob, mime-types-data, mime-types, mail, actionmailer, nio4r, websocket-extensions, websocket-driver, actioncable, thor, method_source, railties, bundler, sprockets, sprockets-rails, rails after 205 seconds
36 gems installed
$ cd redmine
$ rake config/
Could not find gem ‘rails (= 4.2.8)’ in any of the gem sources listed in your Gemfile.
# bundle install
・・・
Bundler::SudoNotPermittedError: Bundler requires sudo access to install at the
moment. Try installing again, granting Bundler sudo access when prompted, or
installing into a different path.
An error occurred while installing i18n (0.7.0), and Bundler cannot
continue.
Make sure that `gem install i18n -v ‘0.7.0’` succeeds before bundling.
In Gemfile:
rails was resolved to 4.2.8, which depends on
actionmailer was resolved to 4.2.8, which depends on
actionpack was resolved to 4.2.8, which depends on
actionview was resolved to 4.2.8, which depends on
rails-dom-testing was resolved to 1.0.8, which depends on
rails-deprecated_sanitizer was resolved to 1.0.3, which depends on
activesupport was resolved to 4.2.8, which depends on
i18n
ownCloudの導入(Debian jessie)
ownCloudを使って、自前でDropboxのようなクラウドストレージサービスを導入する。
ownCloudのサイトにアクセスする。
URL
https://owncloud.org/install/
ownCloud-10.0.2.zipをダウンロードする。
解凍してできた「owncloud」ディレクトリを、apacheのドキュメントディレクトリに移動する。
ここでは、例としてバーチャルホスト「mycloud.hoge.jp」でownCloudを動かすことを想定し設定を行う。
ヴァーチャルホストのディレクトリを格納するディレクトリ「vhosts」を作成する。
# mkdir /var/www/vhosts
解凍したowncloudディレクトリをvhostsの中に入れる。
# mv owncloud /var/www/vhosts/
owncloudのディレクトリ名を「mycloud.hoge.jp」に変更する。
(見た目でわかり易くしているだけで、必ずしも必要な操作ではない)
# cd /var/www/vhosts
# mv owncloud mycloud.hoge.jp
apacheにバーチャルホストを追加する。
# cd /etc/apache
# cd sites-available
# nano mycloud.hoge.jp.conf
「mycloud.hoge.jp.conf」ファイルに以下を記述する。
ServerName mycl.hoge.jp
ServerAdmin webmaster@hoge.jp
DocumentRoot /var/www/vhosts/mycl.hoge.jp
ErrorLog /var/log/apache2/mycl.hoge.jp.error.log
CustomLog /var/log/apache2/mycl.hoge.jp.access.log combined
LogLevel warn
バーチャルホストを追加する。
# a2ensite mycl.hoge.jp
apacheをリロードする。
# service apache2 reload
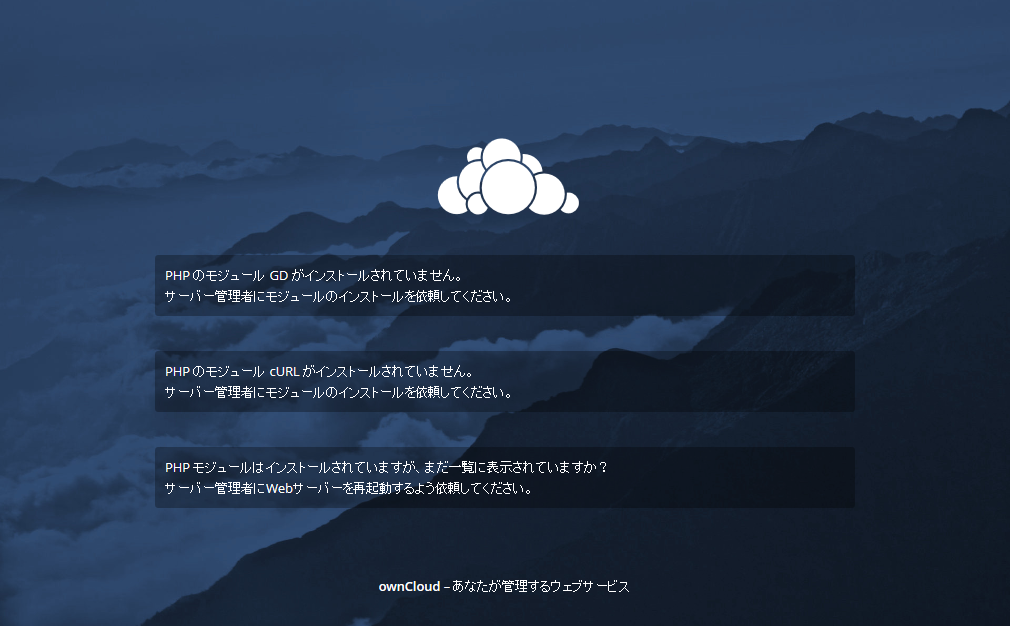
ブラウザから、インストールしたownCloudにアクセスする。
URL
http://mycl.hoge.jp/
※事前にバーチャルホスト名でアクセスできるように、必要であればネームサーバの設定をしておくこと。

「データベースドライバー (sqlite, mysql, postgresql) がインストールされていません。」
が表示された場合は、php5-sqliteかphp5-mysql、php5-pgsqlのいずれかをインストールする。
# apt-get install php5-pgsql
apache2をリロードする。
# service apache2 reload
ページを再読み込みして再度確認する。
Subversionの導入(Debian jessie)
/etc/apt/sources.listにリポジトリを追加する
deb http://opensource.wandisco.com/debian/ jessie svn19
gpg-keyをダウンロードする
# wget http://opensource.wandisco.com/wandisco-debian.gpg
keyを追加する
# apt-key add wandisco-debian.gpg
パッケージリストの更新
# apt-get update
Subversionのインストール
# apt-get install subversion
バージョン確認
# subversion –version
svn, version 1.9.5 (r1770682)
compiled Dec 1 2016, 14:48:33 on x86_64-unknown-linux-gnuCopyright (C) 2016 The Apache Software Foundation.
This software consists of contributions made by many people;
see the NOTICE file for more information.
Subversion is open source software, see http://subversion.apache.org/以下のリポジトリアクセス (RA) モジュールが利用できます:
* ra_svn : svn ネットワークプロトコルを使ってリポジトリにアクセスするモジュール。
– Cyrus SASL 認証を併用
– ‘svn’ スキームを操作します
* ra_local : ローカルディスク上のリポジトリにアクセスするモジュール。
– ‘file’ スキームを操作します
* ra_serf : Module for accessing a repository via WebDAV protocol using serf.
– using serf 1.3.7 (compiled with 1.3.8)
– ‘http’ スキームを操作します
– ‘https’ スキームを操作しますThe following authentication credential caches are available:
* Plaintext cache in /root/.subversion
* Gnome Keyring
* GPG-Agent
* KWallet (KDE)
mysql5.5で文字コードをutf8にする(Debian jessie)
[mysqld]
...
character-set-server=utf8

[client]
default-character-set=utf8
Postfix+PostgreSQL(lenny)
# apt-get install postfix-pgsql
Reading package lists... Done
Building dependency tree
Reading state information... Done
The following NEW packages will be installed:
  postfix-pgsql
0 upgraded, 1 newly installed, 0 to remove and 0 not upgraded.
3 not fully installed or removed.
Need to get 43.5kB of archives.
After this operation, 77.8kB of additional disk space will be used.
Get:1 http://ftp.debian.org lenny/main postfix-pgsql 2.5.5-1.1 [43.5kB]
Fetched 43.5kB in 2s (19.9kB/s)
Selecting previously deselected package postfix-pgsql.
(Reading database ... 23269 files and directories currently installed.)
Unpacking postfix-pgsql (from .../postfix-pgsql_2.5.5-1.1_i386.deb) ...
Setting up dovecot-common (1:1.0.15-2.3+lenny1) ...
Creating generic self-signed certificate: /etc/ssl/certs/dovecot.pem
(replace with hand-crafted or authorized one if needed).
hostname: Unknown host
dpkg: error processing dovecot-common (--configure):
 subprocess post-installation script returned error exit status 1
dpkg: dependency problems prevent configuration of dovecot-imapd:
 dovecot-imapd depends on dovecot-common (= 1:1.0.15-2.3+lenny1); however:
  Package dovecot-common is not configured yet.
dpkg: error processing dovecot-imapd (--configure):
 dependency problems - leaving unconfigured
dpkg: dependency problems prevent configuration of dovecot-pop3d:
 dovecot-pop3d depends on dovecot-common (= 1:1.0.15-2.3+lenny1); however:
  Package dovecot-common is not configured yet.
dpkg: error processing dovecot-pop3d (--configure):
 dependency problems - leaving unconfigured
Setting up postfix-pgsql (2.5.5-1.1) ...
Adding pgsql map entry to /etc/postfix/dynamicmaps.cf
Errors were encountered while processing:
 dovecot-common
 dovecot-imapd
 dovecot-pop3d
E: Sub-process /usr/bin/dpkg returned an error code (1)
#
postfixadminユーザとデータベースの作成
# psql -u postgres
postgres=# CREATE ROLE postfixadmin WITH LOGIN PASSWORD 'パスワード';
postgres=# CREATE DATABASE postfix OWNER postfixadmin;
postfixadminのインストール
# wget http://jaist.dl.sourceforge.net/sourceforge/postfixadmin/postfixadmin_2.3rc3_all.deb
# dpkg -i postfixadmin_2.3rc3_all.deb
postfixadminは”/usr/share/postfixadmin/ “にインストールされます。
Apacheの設定ファイルにaliasが追加されます → /etc/apache2/conf.d/postfixadmin
設定ファイルを編集します。
vi config.inc.php
/*****************************************************************
* !!!!!!!!!!!!!!!!!!!!!!!!!!!!!!!!!!!!!!!!!!!!!!!!!!!!!!!!!!!!
* The following line needs commenting out or removing before the
* application will run!
* Doing this implies you have changed this file as required.
*/
$CONF['configured'] = false;
// Postfix Admin Path
// Set the location of your Postfix Admin installation here.
// YOU MUST ENTER THE COMPLETE URL e.g. http://domain.tld/postfixadmin
$CONF['postfix_admin_url'] = 'http://ホスト名/postfixadmin';
// shouldn't need changing.
$CONF['postfix_admin_path'] = '/usr/share/postfixadmin';
// Language config
// Language files are located in './languages', change as required..
$CONF['default_language'] = 'en';
// Database Config
// mysql = MySQL 3.23 and 4.0, 4.1 or 5
// mysqli = MySQL 4.1+
// pgsql = PostgreSQL
$CONF['database_type'] = 'pgsql';
$CONF['database_host'] = 'localhost';
$CONF['database_user'] = 'postfix';
$CONF['database_password'] = 'パスワード';
$CONF['database_name'] = 'postfix';
$CONF['database_prefix'] = '';
// Here, if you need, you can customize table names.
$CONF['database_prefix'] = '';
$CONF['database_tables'] = array (
'admin' => 'admin',
'alias' => 'alias',
'alias_domain' => 'alias_domain',
'config' => 'config',
'domain' => 'domain',
'domain_admins' => 'domain_admins',
'fetchmail' => 'fetchmail',
'log' => 'log',
'mailbox' => 'mailbox',
'vacation' => 'vacation',
'vacation_notification' => 'vacation_notification',
'quota' => 'quota',
);
// Site Admin
// Define the Site Admins email address below.
// This will be used to send emails from to create mailboxes.
$CONF['admin_email'] = 'postmaster@change-this-to-your.domain.tld';
// Mail Server
// Hostname (FQDN) of your mail server.
// This is used to send email to Postfix in order to create mailboxes.
$CONF['smtp_server'] = 'localhost';
$CONF['smtp_port'] = '25';
// Encrypt
// In what way do you want the passwords to be crypted?
// md5crypt = internal postfix admin md5
// md5 = md5 sum of the password
// system = whatever you have set as your PHP system default
// cleartext = clear text passwords (ouch!)
// mysql_encrypt = useful for PAM integration
// authlib = support for courier-authlib style passwords
// dovecot:CRYPT-METHOD = use dovecotpw -s 'CRYPT-METHOD'. Example: dovecot:CRAM-MD5
$CONF['encrypt'] = 'md5crypt';
// In what flavor should courier-authlib style passwords be enrypted?
// md5 = {md5} + base64 encoded md5 hash
// md5raw = {md5raw} + plain encoded md5 hash
// crypt = {crypt} + Standard UNIX DES-enrypted with 2-character salt
$CONF['authlib_default_flavor'] = 'md5raw';
// If you use the dovecot encryption method: where is the dovecotpw binary located?
$CONF['dovecotpw'] = "/usr/sbin/dovecotpw";
// Minimum length required for passwords. Postfixadmin will not
// allow users to set passwords which are shorter than this value.
$CONF['min_password_length'] = 5;
// Generate Password
// Generate a random password for a mailbox or admin and display it.
// If you want to automagically generate paswords set this to 'YES'.
$CONF['generate_password'] = 'NO';
// Show Password
// Always show password after adding a mailbox or admin.
// If you want to always see what password was set set this to 'YES'.
$CONF['show_password'] = 'NO';
// Page Size
// Set the number of entries that you would like to see
// in one page.
$CONF['page_size'] = '10';
// Default Aliases
// The default aliases that need to be created for all domains.
$CONF['default_aliases'] = array (
'abuse' => 'abuse@change-this-to-your.domain.tld',
'hostmaster' => 'hostmaster@change-this-to-your.domain.tld',
'postmaster' => 'postmaster@change-this-to-your.domain.tld',
'webmaster' => 'webmaster@change-this-to-your.domain.tld'
);
// Mailboxes
// If you want to store the mailboxes per domain set this to 'YES'.
// Examples:
// YES: /usr/local/virtual/domain.tld/username@domain.tld
// NO: /usr/local/virtual/username@domain.tld
$CONF['domain_path'] = 'YES';
// If you don't want to have the domain in your mailbox set this to 'NO'.
// Examples:
// YES: /usr/local/virtual/domain.tld/username@domain.tld
// NO: /usr/local/virtual/domain.tld/username
// Note: If $CONF['domain_path'] is set to NO, this setting will be forced to YES.
$CONF['domain_in_mailbox'] = 'NO';
// Default Domain Values
// Specify your default values below. Quota in MB.
$CONF['aliases'] = '10';
$CONF['mailboxes'] = '10';
$CONF['maxquota'] = '10';
// Quota
// When you want to enforce quota for your mailbox users set this to 'YES'.
$CONF['quota'] = 'NO';
// You can either use '1024000' or '1048576'
$CONF['quota_multiplier'] = '1024000';
// Transport
// If you want to define additional transport options for a domain set this to 'YES'.
// Read the transport file of the Postfix documentation.
$CONF['transport'] = 'NO';
// Transport options
// If you want to define additional transport options put them in array below.
$CONF['transport_options'] = array (
'virtual', // for virtual accounts
'local', // for system accounts
'relay' // for backup mx
);
// Transport default
// You should define default transport. It must be in array above.
$CONF['transport_default'] = 'virtual';
// Virtual Vacation
// If you want to use virtual vacation for you mailbox users set this to 'YES'.
// NOTE: Make sure that you install the vacation module. http://high5.net/postfixadmin/
$CONF['vacation'] = 'NO';
// This is the autoreply domain that you will need to set in your Postfix
// transport maps to handle virtual vacations. It does not need to be a
// real domain (i.e. you don't need to setup DNS for it).
$CONF['vacation_domain'] = 'autoreply.change-this-to-your.domain.tld';
// Vacation Control
// If you want users to take control of vacation set this to 'YES'.
$CONF['vacation_control'] ='YES';
// Vacation Control for admins
// Set to 'YES' if your domain admins should be able to edit user vacation.
$CONF['vacation_control_admin'] = 'YES';
// Alias Control
// Postfix Admin inserts an alias in the alias table for every mailbox it creates.
// The reason for this is that when you want catch-all and normal mailboxes
// to work you need to have the mailbox replicated in the alias table.
// If you want to take control of these aliases as well set this to 'YES'.
$CONF['alias_control'] = 'NO';
// Alias Control for admins
// Set to 'NO' if your domain admins shouldn't be able to edit user aliases.
$CONF['alias_control_admin'] = 'NO';
// Special Alias Control
// Set to 'NO' if your domain admins shouldn't be able to edit default aliases.
$CONF['special_alias_control'] = 'NO';
// Alias Goto Field Limit
// Set the max number of entries that you would like to see
// in one 'goto' field in overview, the rest will be hidden and "[and X more...]" will be added.
// '0' means no limits.
$CONF['alias_goto_limit'] = '0';
// Alias Domains
// Alias domains allow to "mirror" aliases and mailboxes to another domain. This makes
// configuration easier if you need the same set of aliases on multiple domains, but
// also requires postfix to do more database queries.
// Note: If you update from 2.2.x or earlier, you will have to update your postfix configuration.
// Set to 'NO' to disable alias domains.
$CONF['alias_domain'] = 'YES';
// Backup
// If you don't want backup tab set this to 'NO';
$CONF['backup'] = 'YES';
// Send Mail
// If you don't want sendmail tab set this to 'NO';
$CONF['sendmail'] = 'YES';
// Logging
// If you don't want logging set this to 'NO';
$CONF['logging'] = 'YES';
// Fetchmail
// If you don't want fetchmail tab set this to 'NO';
$CONF['fetchmail'] = 'YES';
// fetchmail_extra_options allows users to specify any fetchmail options and any MDA
// (it will even accept 'rm -rf /' as MDA!)
// This should be set to NO, except if you *really* trust *all* your users.
$CONF['fetchmail_extra_options'] = 'NO';
// Header
$CONF['show_header_text'] = 'NO';
$CONF['header_text'] = ':: Postfix Admin ::';
// link to display under 'Main' menu when logged in as a user.
$CONF['user_footer_link'] = "http://change-this-to-your.domain.tld/main";
// Footer
// Below information will be on all pages.
// If you don't want the footer information to appear set this to 'NO'.
$CONF['show_footer_text'] = 'YES';
$CONF['footer_text'] = 'Return to change-this-to-your.domain.tld';
$CONF['footer_link'] = 'http://change-this-to-your.domain.tld';
// Welcome Message
// This message is send to every newly created mailbox.
// Change the text between EOM.
$CONF['welcome_text'] = <<<EOM
Hi,
Welcome to your new account.
EOM;
// When creating mailboxes or aliases, check that the domain-part of the
// address is legal by performing a name server look-up.
$CONF['emailcheck_resolve_domain']='YES';
// Optional:
// Analyze alias gotos and display a colored block in the first column
// indicating if an alias or mailbox appears to deliver to a non-existent
// account. Also, display indications, for POP/IMAP mailboxes and
// for custom destinations (such as mailboxes that forward to a UNIX shell
// account or mail that is sent to a MS exchange server, or any other
// domain or subdomain you use)
// See http://www.w3schools.com/html/html_colornames.asp for a list of
// color names available on most browsers
//set to YES to enable this feature
$CONF['show_status']='NO';
//display a guide to what these colors mean
$CONF['show_status_key']='NO';
// 'show_status_text' will be displayed with the background colors
// associated with each status, you can customize it here
$CONF['show_status_text']=' ';
// show_undeliverable is useful if most accounts are delivered to this
// postfix system. If many aliases and mailboxes are forwarded
// elsewhere, you will probably want to disable this.
$CONF['show_undeliverable']='NO';
$CONF['show_undeliverable_color']='tomato';
// mails to these domains will never be flagged as undeliverable
$CONF['show_undeliverable_exceptions']=array("unixmail.domain.ext","exchangeserver.domain.ext","gmail.com");
$CONF['show_popimap']='NO';
$CONF['show_popimap_color']='darkgrey';
// you can assign special colors to some domains. To do this,
// - add the domain to show_custom_domains
// - add the corresponding color to show_custom_colors
$CONF['show_custom_domains']=array("subdomain.domain.ext","domain2.ext");
$CONF['show_custom_colors']=array("lightgreen","lightblue");
// Optional:
// Script to run after creation of mailboxes.
// Note that this may fail if PHP is run in "safe mode", or if
// operating system features (such as SELinux) or limitations
// prevent the web-server from executing external scripts.
// $CONF['mailbox_postcreation_script']='sudo -u courier /usr/local/bin/postfixadmin-mailbox-postcreation.sh';
// Optional:
// Script to run after alteration of mailboxes.
// Note that this may fail if PHP is run in "safe mode", or if
// operating system features (such as SELinux) or limitations
// prevent the web-server from executing external scripts.
// $CONF['mailbox_postedit_script']='sudo -u courier /usr/local/bin/postfixadmin-mailbox-postedit.sh';
// Optional:
// Script to run after deletion of mailboxes.
// Note that this may fail if PHP is run in "safe mode", or if
// operating system features (such as SELinux) or limitations
// prevent the web-server from executing external scripts.
// $CONF['mailbox_postdeletion_script']='sudo -u courier /usr/local/bin/postfixadmin-mailbox-postdeletion.sh';
// Optional:
// Script to run after creation of domains.
// Note that this may fail if PHP is run in "safe mode", or if
// operating system features (such as SELinux) or limitations
// prevent the web-server from executing external scripts.
//$CONF['domain_postcreation_script']='sudo -u courier /usr/local/bin/postfixadmin-domain-postcreation.sh';
// Optional:
// Script to run after deletion of domains.
// Note that this may fail if PHP is run in "safe mode", or if
// operating system features (such as SELinux) or limitations
// prevent the web-server from executing external scripts.
// $CONF['domain_postdeletion_script']='sudo -u courier /usr/local/bin/postfixadmin-domain-postdeletion.sh';
// Optional:
// Sub-folders which should automatically be created for new users.
// The sub-folders will also be subscribed to automatically.
// Will only work with IMAP server which implement sub-folders.
// Will not work with POP3.
// If you define create_mailbox_subdirs, then the
// create_mailbox_subdirs_host must also be defined.
//
// $CONF['create_mailbox_subdirs']=array('Spam');
// $CONF['create_mailbox_subdirs_host']='localhost';
//
// Specify '' for Dovecot and 'INBOX.' for Courier.
$CONF['create_mailbox_subdirs_prefix']='INBOX.';
// Optional:
// Show used quotas from Dovecot dictionary backend in virtual
// mailbox listing.
// See: DOCUMENTATION/DOVECOT.txt
// http://wiki.dovecot.org/Quota/Dict
//
// $CONF['used_quotas'] = 'YES';
//
// Normally, the TCP port number does not have to be specified.
// $CONF['create_mailbox_subdirs_hostport']=143;
//
// If you have trouble connecting to the IMAP-server, then specify
// a value for $CONF['create_mailbox_subdirs_hostoptions']. These
// are some examples to experiment with:
// $CONF['create_mailbox_subdirs_hostoptions']=array('notls');
// $CONF['create_mailbox_subdirs_hostoptions']=array('novalidate-cert','norsh');
// See also the "Optional flags for names" table at
// http://www.php.net/manual/en/function.imap-open.php
// Theme Config
// Specify your own logo and CSS file
$CONF['theme_logo'] = 'images/logo-default.png';
$CONF['theme_css'] = 'css/default.css';
// If you want to keep most settings at default values and/or want to ensure
// that future updates work without problems, you can use a separate config
// file (config.local.php) instead of editing this file and override some
// settings there.
if (file_exists(dirname(__FILE__) . '/config.local.php')) { # for /
include(dirname(__FILE__) . '/config.local.php');
}
//
// END OF CONFIG FILE
//
/* vim: set expandtab softtabstop=4 tabstop=4 shiftwidth=4: */
http://ホスト名/postfixadmin/setup.phpにアクセスします。
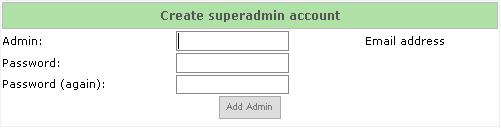 管理者のメールアドレス、パスワードを入力します。
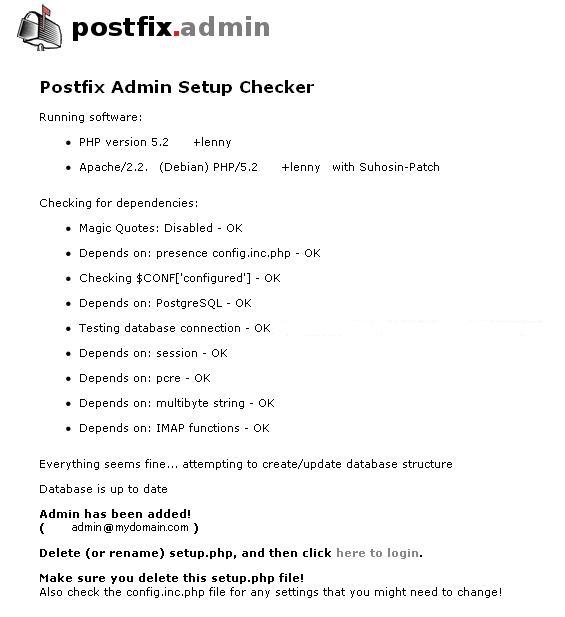 ここで、setup.phpを削除(orリネーム)します。ログイン画面
http://ホスト名/postfixadmin/login.php
にアクセスします。
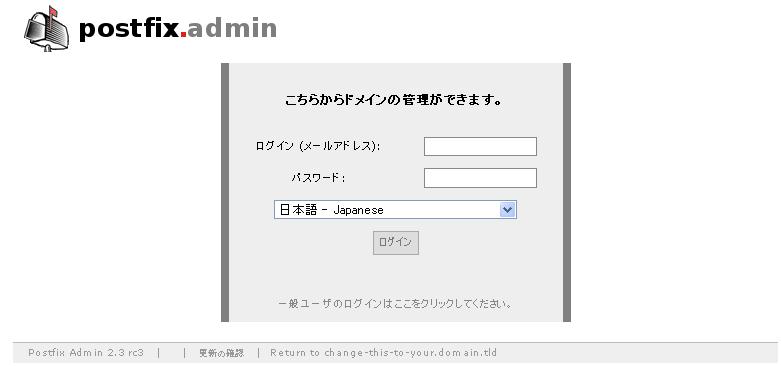 ログイン画面が表示されることを確認します。
(ここでは表示の確認のみ行い、設定は行いません)
メール専用ユーザ作成
# adduser vmailuser
また、uid,gidを確認します。
# vipw
・・・
vmailuser:x:1000:1000::/home/vmailuser:/bin/bash
※ここでは1000となっていますが、環境によって表示が変わります。
ご自分の環境に合わせてください。
PostfixにPostgreSQLの設定を追加
# vi /etc/postfix/pgsql_virtual_alias_maps.cf
user = postfixadmin
password = パスワード
hosts = localhost
dbname = postfix
query = SELECT goto FROM alias WHERE address='%s' AND active = true
# vi /etc/postfix/pgsql_virtual_domains_maps.cf
user = postfixadmin
password = パスワード
hosts = localhost
dbname = postfix
query = SELECT domain FROM domain WHERE domain='%s' and backupmx = false and active = true
# vi /etc/postfix/pgsql_virtual_mailbox_maps.cf
user = postfixadmin
password = パスワード
hosts = localhost
dbname = postfix
query = SELECT maildir||'Maildir/' FROM mailbox WHERE username='%s'
# vi /etc/postfix/main.cf
# SMTP
smtpd_sasl_auth_enable = yes
smtpd_sasl_type = dovecot
smtpd_sasl_path = private/auth-dovecot
smtpd_sasl_authenticated_header = yes
smtpd_recipient_restrictions = permit_mynetworks,permit_sasl_authenticated,reject_unauth_destination
# Virtual Domain
mydestination =
local_transport = virtual
virtual_transport = virtual
virtual_mailbox_base = /home/vmailuser
virtual_alias_maps = pgsql:/etc/postfix/pgsql_virtual_alias_maps.cf
virtual_alias_domains = $virtual_alias_maps
virtual_mailbox_domains = pgsql:/etc/postfix/pgsql_virtual_domains_maps.cf
virtual_mailbox_maps = pgsql:/etc/postfix/pgsql_virtual_mailbox_maps.cf
virtual_minimum_uid = 1000
virtual_uid_maps = static:1000
virtual_gid_maps = static:1000
設定後、postfixを再起動します。
# /etc/init.d/postfix restart
dovecotにPostgreSQLの設定を追加
# vi /etc/dovecot.conf
・・・

 # SQL database <doc/wiki/AuthDatabase.SQL.txt>
 passdb sql {
   args = /etc/dovecot/dovecot-sql-pgsql.conf
 }

・・・

 # SQL database <doc/wiki/AuthDatabase.SQL.txt>
 userdb sql {
   args = /etc/dovecot/dovecot-sql-pgsql.conf
 }
# vi /etc/dovecot/dovecot-sql-pgsql.conf
driver = pgsql
connect = host=localhost user=postfixadmin password=パスワード dbname=postfix
default_pass_scheme = MD5-CRYPT
password_query = SELECT password FROM mailbox WHERE username = '%u' AND active = 'Y'
user_query = SELECT '/home/vmailuser/'||maildir AS home, 1000 AS uid, 1000 AS gid FROM mailbox WHERE username = '%u' AND active = '1'
設定後、dovecotを再起動します。
# /etc/init.d/dovecot restart
設定は以上です。http://ホスト名/postfixadmin/にアクセスして確認します。
Postfixの導入(lenny)
exim4の削除
デフォルトでexim4がインストールされているため、これを停止する。
# /etc/init.d/exim4 stop
exim4をアンインストールする。
# apt-get remove --purge exim4
postfixインストール
# apt-get install postfix
Reading package lists... Done
Building dependency tree
Reading state information... Done
Suggested packages:
  postfix-mysql postfix-pgsql postfix-ldap postfix-pcre libsasl2-modules
  resolvconf postfix-cdb mail-reader ufw
The following NEW packages will be installed:
  postfix
0 upgraded, 1 newly installed, 0 to remove and 0 not upgraded.
Need to get 1224kB of archives.
After this operation, 2793kB of additional disk space will be used.
Get:1 http://ftp.debian.org lenny/main postfix 2.5.5-1.1 [1224kB]
Fetched 1224kB in 9s (130kB/s)
Preconfiguring packages ...
Selecting previously deselected package postfix.
(Reading database ... 22841 files and directories currently installed.)
Unpacking postfix (from .../postfix_2.5.5-1.1_i386.deb) ...
Setting up postfix (2.5.5-1.1) ...
Adding group `postfix' (GID 108) ...
Done.
Adding system user `postfix' (UID 105) ...
Adding new user `postfix' (UID 105) with group `postfix' ...
Not creating home directory `/var/spool/postfix'.
Creating /etc/postfix/dynamicmaps.cf
Adding tcp map entry to /etc/postfix/dynamicmaps.cf
Adding group `postdrop' (GID 109) ...
Done.
setting myhostname: UNKNOWN
setting alias maps
setting alias database
changing /etc/mailname to (設定したmailname)
setting myorigin
setting destinations: (設定したmailname), localhost, localhost.localdomain, localhost
setting relayhost:
setting mynetworks: 127.0.0.0/8 [::ffff:127.0.0.0]/104 [::1]/128
setting mailbox_command
setting mailbox_size_limit: 0
setting recipient_delimiter: +
setting inet_interfaces: all
WARNING: /etc/aliases exists, but does not have a root alias.

Postfix is now set up with a default configuration.  If you need to make
changes, edit
/etc/postfix/main.cf (and others) as needed.  To view Postfix configuration
values, see postconf(1).

After modifying main.cf, be sure to run '/etc/init.d/postfix reload'.

Running newaliases
Stopping Postfix Mail Transport Agent: postfix.
Starting Postfix Mail Transport Agent: postfix.
#
Dovecot(pop3,imap)の導入
インストール
# apt-get install dovecot-common dovecot-pop3d dovecot-imapd
dovecot.confの編集
# vi /etc/dovecot/dovecot.conf
・・・
# Protocols we want to be serving: imap imaps pop3 pop3s managesieve
# If you only want to use dovecot-auth, you can set this to "none".
#protocols = imap imaps
protocols = imap pop3
・・・
# Disable LOGIN command and all other plaintext authentications unless
# SSL/TLS is used (LOGINDISABLED capability). Note that if the remote IP
# matches the local IP (ie. you're connecting from the same computer), the
# connection is considered secure and plaintext authentication is allowed.
#disable_plaintext_auth = yes
disable_plaintext_auth = no
・・・
##
## Logging
##

auth_verbose = yes
auth_debug = yes
auth_debug_passwords = yes

# Log file to use for error messages, instead of sending them to syslog.
# /dev/stderr can be used to log into stderr.
#log_path =
log_path = /var/log/dovecot.log

# Log file to use for informational and debug messages.
# Default is the same as log_path.
#info_log_path =

# Prefix for each line written to log file. % codes are in strftime(3)
# format.
#log_timestamp = "%b %d %H:%M:%S "
log_timestamp = "%Y-%m-%d %H:%M:%S "
・・・
##
## SSL settings
##

# IP or host address where to listen in for SSL connections. Defaults
# to above if not specified.
#ssl_listen =

# Disable SSL/TLS support.
#ssl_disable = no
ssl_disable = yes
・・・
##
## Mailbox locations and namespaces
##

# Location for users' mailboxes. This is the same as the old default_mail_env
# setting. The default is empty, which means that Dovecot tries to find the
# mailboxes automatically. This won't work if the user doesn't have any mail
# yet, so you should explicitly tell Dovecot the full location.
#
# If you're using mbox, giving a path to the INBOX file (eg. /var/mail/%u)
# isn't enough. You'll also need to tell Dovecot where the other mailboxes are
# kept. This is called the "root mail directory", and it must be the first
# path given in the mail_location setting.
#
# There are a few special variables you can use, eg.:
#
#   %u - username
#   %n - user part in user@domain, same as %u if there's no domain
#   %d - domain part in user@domain, empty if there's no domain
#   %h - home directory
#
# See /usr/share/doc/dovecot-common/wiki/Variables.txt for full list. Some
# examples:
#
#   mail_location = maildir:~/Maildir
#   mail_location = mbox:~/mail:INBOX=/var/mail/%u
#   mail_location = mbox:/var/mail/%d/%1n/%n:INDEX=/var/indexes/%d/%1n/%n
#
# <doc/wiki/MailLocation.txt>
#
#mail_location =
mail_location = maildir:~/Maildir
・・・
protocol imap {
}
・・・
protocol pop3 {
  pop3_uidl_format = %08Xu%08Xv
}
・・・
auth default {
  # Space separated list of wanted authentication mechanisms:
  #   plain login digest-md5 cram-md5 ntlm rpa apop anonymous gssapi
  # NOTE: See also disable_plaintext_auth setting.
  mechanisms = cram-md5 plain login

  #
  # Password database is used to verify user's password (and nothing more).
  # You can have multiple passdbs and userdbs. This is useful if you want to
  # allow both system users (/etc/passwd) and virtual users to login without
  # duplicating the system users into virtual database.
  #
  # <doc/wiki/PasswordDatabase.txt>
  #
  # By adding master=yes setting inside a passdb you make the passdb a list
  # of "master users", who can log in as anyone else. Unless you're using PAM,
  # you probably still want the destination user to be looked up from passdb
  # that it really exists. This can be done by adding pass=yes setting to the
  # master passdb. <doc/wiki/Authentication.MasterUsers.txt>

  # Users can be temporarily disabled by adding a passdb with deny=yes.
  # If the user is found from that database, authentication will fail.
  # The deny passdb should always be specified before others, so it gets
  # checked first. Here's an example:

  passdb passwd-file {
    # File contains a list of usernames, one per line
    #args = /etc/dovecot.deny
    #deny = yes
    args = /etc/dovecot/passwd
  }

  # PAM authentication. Preferred nowadays by most systems.
  # Note that PAM can only be used to verify if user's password is correct,
  # so it can't be used as userdb. If you don't want to use a separate user
  # database (passwd usually), you can use static userdb.
  # REMEMBER: You'll need /etc/pam.d/dovecot file created for PAM
  # authentication to actually work. <doc/wiki/PasswordDatabase.PAM.txt>
  passdb pam {
    # [blocking=yes] [session=yes] [setcred=yes]
    # [cache_key=<key>] [<service name>]
    #
    # By default a new process is forked from dovecot-auth for each PAM lookup.
    # Setting blocking=yes uses the alternative way: dovecot-auth worker
    # processes do the PAM lookups.
    #
    # session=yes makes Dovecot open and immediately close PAM session. Some
    # PAM plugins need this to work, such as pam_mkhomedir.
    #
    # setcred=yes makes Dovecot establish PAM credentials if some PAM plugins
    # need that. They aren't ever deleted though, so this isn't enabled by
    # default.
    #
    # cache_key can be used to enable authentication caching for PAM
    # (auth_cache_size also needs to be set). It isn't enabled by default
    # because PAM modules can do all kinds of checks besides checking password,
    # such as checking IP address. Dovecot can't know about these checks
    # without some help. cache_key is simply a list of variables (see
    # /usr/share/doc/dovecot-common/wiki/Variables.txt) which must match for
    # the cached data to be used. Here are some examples:
    #   %u - Username must match. Probably sufficient for most uses.
    #   %u%r - Username and remote IP address must match.
    #   %u%s - Username and service (ie. IMAP, POP3) must match.
    #
    # If service name is "*", it means the authenticating service name
    # is used, eg. pop3 or imap (/etc/pam.d/pop3, /etc/pam.d/imap).
    #
    # Some examples:
    #   args = session=yes *
    #   args = cache_key=%u dovecot
    #args = dovecot
  }

  # System users (NSS, /etc/passwd, or similiar)
  # In many systems nowadays this uses Name Service Switch, which is
  # configured in /etc/nsswitch.conf. <doc/wiki/AuthDatabase.Passwd.txt>
  #passdb passwd {
    # [blocking=yes] - See userdb passwd for explanation
    #args =
  #}

  # Shadow passwords for system users (NSS, /etc/shadow or similiar).
  # Deprecated by PAM nowadays.
  # <doc/wiki/PasswordDatabase.Shadow.txt>
  #passdb shadow {
    # [blocking=yes] - See userdb passwd for explanation
    #args =
  #}

  # PAM-like authentication for OpenBSD.
  # <doc/wiki/PasswordDatabase.BSDAuth.txt>
  #passdb bsdauth {
    # [cache_key=<key>] - See cache_key in PAM for explanation.
    #args =
  #}

  # passwd-like file with specified location
  # <doc/wiki/AuthDatabase.PasswdFile.txt>
  #passdb passwd-file {
    # Path for passwd-file
    #args =
  #}

  # checkpassword executable authentication
  # NOTE: You will probably want to use "userdb prefetch" with this.
  # <doc/wiki/PasswordDatabase.CheckPassword.txt>
  #passdb checkpassword {
    # Path for checkpassword binary
    #args =
  #}

  # SQL database <doc/wiki/AuthDatabase.SQL.txt>
  #passdb sql {
    # Path for SQL configuration file
    #args = /etc/dovecot/dovecot-sql.conf
  #}

  # LDAP database <doc/wiki/AuthDatabase.LDAP.txt>
  #passdb ldap {
    # Path for LDAP configuration file
    #args = /etc/dovecot/dovecot-ldap.conf
  #}

  # vpopmail authentication <doc/wiki/AuthDatabase.VPopMail.txt>
  #passdb vpopmail {
    # [cache_key=<key>] - See cache_key in PAM for explanation.
    #args =
  #}

  #
  # User database specifies where mails are located and what user/group IDs
  # own them. For single-UID configuration use "static".
  #
  # <doc/wiki/UserDatabase.txt>
  #

  # System users (NSS, /etc/passwd, or similiar). In many systems nowadays this
  # uses Name Service Switch, which is configured in /etc/nsswitch.conf.
  # <doc/wiki/AuthDatabase.Passwd.txt>
  userdb passwd {
    # [blocking=yes] - By default the lookups are done in the main dovecot-auth
    # process. This setting causes the lookups to be done in auth worker
    # proceses. Useful with remote NSS lookups that may block.
    # NOTE: Be sure to use this setting with nss_ldap or users might get
    # logged in as each others!
    #args =
  }

  # passwd-like file with specified location
  # <doc/wiki/AuthDatabase.PasswdFile.txt>
  userdb passwd-file {
    # Path for passwd-file
    args = /etc/dovecot/passwd
  }

  # static settings generated from template <doc/wiki/UserDatabase.Static.txt>
  #userdb static {
    # Template for the fields. Can return anything a userdb could normally
    # return. For example:
    #
    #  args = uid=500 gid=500 home=/var/mail/%u
    #
    # If you use deliver, it needs to look up users only from the userdb. This
    # of course doesn't work with static because there is no list of users.
    # Normally static userdb handles this by doing a passdb lookup. This works
    # with most passdbs, with PAM being the most notable exception. If you do
    # the user verification another way, you can add allow_all_users=yes to
    # the args in which case the passdb lookup is skipped.
    #
    #args =
  #}

  # SQL database <doc/wiki/AuthDatabase.SQL.txt>
  #userdb sql {
    # Path for SQL configuration file
    #args = /etc/dovecot/dovecot-sql.conf
  #}

  # LDAP database <doc/wiki/AuthDatabase.LDAP.txt>
  #userdb ldap {
    # Path for LDAP configuration file
    #args = /etc/dovecot/dovecot-ldap.conf
  #}

  # vpopmail <doc/wiki/AuthDatabase.VPopMail.txt>
  #userdb vpopmail {
  #}

  # "prefetch" user database means that the passdb already provided the
  # needed information and there's no need to do a separate userdb lookup.
  # This can be made to work with SQL and LDAP databases, see their example
  # configuration files for more information how to do it.
  # <doc/wiki/UserDatabase.Prefetch.txt>
  #userdb prefetch {
  #}

  # User to use for the process. This user needs access to only user and
  # password databases, nothing else. Only shadow and pam authentication
  # requires roots, so use something else if possible. Note that passwd
  # authentication with BSDs internally accesses shadow files, which also
  # requires roots. Note that this user is NOT used to access mails.
  # That user is specified by userdb above.
  user = root

  # Directory where to chroot the process. Most authentication backends don't
  # work if this is set, and there's no point chrooting if auth_user is root.
  # Note that valid_chroot_dirs isn't needed to use this setting.
  #chroot =

  # Number of authentication processes to create
  #count = 1

  # Require a valid SSL client certificate or the authentication fails.
  #ssl_require_client_cert = no

  # Take the username from client's SSL certificate, using
  # X509_NAME_get_text_by_NID() which returns the subject's DN's
  # CommonName.
  #ssl_username_from_cert = no

  # It's possible to export the authentication interface to other programs:
  #socket listen {
    #master {
      # Master socket provides access to userdb information. It's typically
      # used to give Dovecot's local delivery agent access to userdb so it
      # can find mailbox locations.
      #path = /var/run/dovecot/auth-master
      #mode = 0600
      # Default user/group is the one who started dovecot-auth (root)
      #user =
      #group =
    #}
    #client {
      # The client socket is generally safe to export to everyone. Typical use
      # is to export it to your SMTP server so it can do SMTP AUTH lookups
      # using it.
      #path = /var/run/dovecot/auth-client
      #mode = 0660
    #}
  #}

  ## dovecot-lda specific settings
  ##
  # socket listen {
  #   master {
  #     path = /var/run/dovecot/auth-master
  #     mode = 0600
  #     user = mail # User running Dovecot LDA
  #     #group = mail # Or alternatively mode 0660 + LDA user in this group
  #   }
  # }

  socket listen {
    client {
    path = /var/spool/postfix/private/auth-dovecot
    mode = 0660
    user = postfix
    group = postfix
    }
  }

}
パスワードファイルの設定
# dovecotpw -lCRYPT MD5 MD5-CRYPT SHA SHA1 SMD5 SSHA PLAIN \
CLEARTEXT CRAM-MD5 HMAC-MD5 DIGEST-MD5 PLAIN-MD4 \
PLAIN-MD5 LDAP-MD5 LANMAN NTLM RPA
CRAM-MD5パスワードは下記コマンドで出力できます。
# dovecotpw -s CRAM-MD5
Enter new password:
Retype new password:
{CRAM-MD5}ace37ad159394e0038338b4e4dcd9481dc691401420b6a3d3ab0777ad9563491
Dovecotユーザの作成
# useradd -u 10000 -s /bin/false vmailmgr
# mkdir /home/dovecot
# mkdir /home/dovecot/mydomain.com
adminというメールアカウントを作成する場合は以下のようにします。
# mkdir /home/dovecot/mydomain.com/admin
パーミッションを変更します。
# chown -R vmailmgr.vmailmgr /home/dovecot
パスワードファイルを作成します
# vi /etc/dovecot/passwd
user1@mydomain.com:{CRAM-MD5}ace37ad159394e0038338b4e4dcd9481dc691401420b6a3d3ab0777ad9563491:10000:100000::/home/dovecot/mydomain.com/user1/::/sbin/nologin
パーミッションを600に変更します。
# chmod 600 /etc/dovecot/passwd
Postfixの設定ファイル(/etc/postfix/main.conf)の編集
# vi /etc/postfix/main.cf
# See /usr/share/postfix/main.cf.dist for a commented, more complete version


# Debian specific:  Specifying a file name will cause the first
# line of that file to be used as the name.  The Debian default
# is /etc/mailname.
#myorigin = /etc/mailname

#smtpd_banner = $myhostname ESMTP $mail_name (Debian/GNU)
smtpd_banner = $myhostname ESMTP
biff = no

# appending .domain is the MUA's job.
append_dot_mydomain = no

# Uncomment the next line to generate "delayed mail" warnings
#delay_warning_time = 4h

readme_directory = no

# TLS parameters
smtpd_tls_cert_file=/etc/ssl/certs/ssl-cert-snakeoil.pem
smtpd_tls_key_file=/etc/ssl/private/ssl-cert-snakeoil.key
smtpd_use_tls=yes
smtpd_tls_session_cache_database = btree:${data_directory}/smtpd_scache
smtp_tls_session_cache_database = btree:${data_directory}/smtp_scache

# See /usr/share/doc/postfix/TLS_README.gz in the postfix-doc package for
# information on enabling SSL in the smtp client.

#myhostname = UNKNOWN
myhostname = mydomain.local
alias_maps = hash:/etc/aliases
alias_database = hash:/etc/aliases
myorigin = /etc/mailname
mydestination = localhost
relayhost =
mynetworks = 127.0.0.0/8 [::ffff:127.0.0.0]/104 [::1]/128
mailbox_command = procmail -a "$EXTENSION"
mailbox_size_limit = 0
recipient_delimiter = +
inet_interfaces = all
home_mailbox = Maildir/

# SMTP
smtpd_sasl_auth_enable = yes
smtpd_sasl_type = dovecot
smtpd_sasl_path = private/auth-dovecot
smtpd_sasl_authenticated_header = yes

# virtual domain
virtual_mailbox_domains = mydomain.com
virtual_mailbox_base = /home/dovecot
virtual_mailbox_maps = hash:/etc/postfix/vmailbox
virtual_alias_maps = hash:/etc/postfix/virtual
virtual_uid_maps = static:10000
virtual_gid_maps = static:10000
サブミッションポートの設定
# vi /etc/postfix/master.cf
#
# Postfix master process configuration file.  For details on the format
# of the file, see the master(5) manual page (command: "man 5 master").
#
# Do not forget to execute "postfix reload" after editing this file.
#
# ==========================================================================
# service type  private unpriv  chroot  wakeup  maxproc command + args
#               (yes)   (yes)   (yes)   (never) (100)
# ==========================================================================
smtp      inet  n       -       -       -       -       smtpd
submission inet n       -       -       -       -       smtpd
#  -o smtpd_tls_security_level=encrypt
  -o smtpd_sasl_auth_enable=yes
  -o smtpd_client_restrictions=permit_sasl_authenticated,reject
#  -o milter_macro_daemon_name=ORIGINATING
・・・
上記のように、submissionの#(コメント)を外し、サブミッションポートを有効にします。
バーチャルメールボックスの設定
/etc/postfix/main.cfでvirtual_mailbox_mapsを記述しましたが、そのファイルを編集します。
# vi /etc/postfix/vmailbox
メールアドレスとMaildirのディレクトリを記述します。
admin@mydomain.com mydomain.com/admin/Maildir/
上記設定で、admin@mydomain.comのMaildirは、
/home/dovecot/mydomain.com/admin/Maildir/
になります。
下記コマンドで設定が反映されます。
# postmap /etc/postfix/vmailbox
バーチャルエイリアスマップスの設定
/etc/postfix/main.cfでvirtual_alias_mapsを記述しましたが、そのファイルを編集します。
バーチャルエイリアスを使用しない場合でも、ファイルが存在しないと正常に動作しないため、空ファイルを作成します。
# touch /etc/postfix/virtual
下記コマンドで、設定が反映されます。
# postmap /etc/postfix/virtual
# strings /etc/postfix/virtual
この後、dovecotを再読み込みし動作を確認します。
# /etc/init.d/dovecot restart
日付のフォーマット(SQL Server)
CONVERTとか
   DECLARE @myDate DATETIME
   SET @myDate= '2005/8/11 12:34:56:789'
YYMMDD系
   SELECT '102' ,CONVERT(VARCHAR(20),@myDate,102) --2005.08.11
   SELECT '120' ,CONVERT(VARCHAR(30),@myDate,120) --2005-08-11 12:34:56
   SELECT '111' ,CONVERT(VARCHAR(20),@myDate,111) --2005/08/11
   SELECT '112' ,CONVERT(VARCHAR(20),@myDate,112) --20050811
   SELECT '121' ,CONVERT(VARCHAR(30),@myDate,121) --2005-08-11 12:34:56.790
   SELECT '126' ,CONVERT(VARCHAR(30),@myDate,126) --2005-08-11T12:34:56.790
   SELECT '2' ,CONVERT(VARCHAR(30),@myDate,2) --05.08.11
   SELECT '11' ,CONVERT(VARCHAR(30),@myDate,11) --05/08/11
   SELECT '12' ,CONVERT(VARCHAR(30),@myDate,12) --050811
YYMM系
   SELECT '112' ,CONVERT(VARCHAR(6),@myDate,112) --200508
   SELECT '12' ,CONVERT(VARCHAR(4),@myDate,12) --0508
MMDDYY系
   SELECT '100' ,CONVERT(VARCHAR(20),@myDate,100) --08 11 2005 12:34PM
   SELECT '101' ,CONVERT(VARCHAR(20),@myDate,101) --08/11/2005
   SELECT '107' ,CONVERT(VARCHAR(20),@myDate,107) --08 11, 2005
   SELECT '109' ,CONVERT(VARCHAR(30),@myDate,109) --08 11 2005 12:34:56:790PM
   SELECT '110' ,CONVERT(VARCHAR(30),@myDate,110) --08-11-2005
   SELECT '1' ,CONVERT(VARCHAR(30),@myDate,1) --08/11/05
   SELECT '7' ,CONVERT(VARCHAR(30),@myDate,7) --08 11, 05
   SELECT '10' ,CONVERT(VARCHAR(30),@myDate,10) --08-11-05
   SELECT '1' ,CONVERT(VARCHAR(5),@myDate,101) --08/11
   SELECT '101' ,CONVERT(VARCHAR(5),@myDate,101) --08/11
DDMMYY系
   SELECT '103' ,CONVERT(VARCHAR(20),@myDate,103) --11/08/2005
   SELECT '104' ,CONVERT(VARCHAR(20),@myDate,104) --11.08.2005
   SELECT '105' ,CONVERT(VARCHAR(20),@myDate,105) --11-08-2005
   SELECT '106' ,CONVERT(VARCHAR(20),@myDate,106) --11 08 2005
   SELECT '113' ,CONVERT(VARCHAR(30),@myDate,113) --11 08 2005 12:34:56:790
   SELECT '3' ,CONVERT(VARCHAR(30),@myDate,3) --11/08/05
   SELECT '4' ,CONVERT(VARCHAR(30),@myDate,4) --11.08.05
   SELECT '5' ,CONVERT(VARCHAR(30),@myDate,5) --11-08-05
   SELECT '6' ,CONVERT(VARCHAR(30),@myDate,6) --11 08 05
時刻系
   SELECT '108' ,CONVERT(VARCHAR(20),@myDate,108) --12:34:56
   SELECT '8' ,CONVERT(VARCHAR(30),@myDate,8) --12:34:56
   SELECT '114' ,CONVERT(VARCHAR(20),@myDate,114) --12:34:56:790
   SELECT '14' ,CONVERT(VARCHAR(30),@myDate,14) --12:34:56:790
逆引き
   --yyyymmdd
   --yyyy/mm/dd
   SELECT '112' ,CONVERT(VARCHAR(20),@myDate,112)
   SELECT '111' ,CONVERT(VARCHAR(20),@myDate,111)
   --yyyymm
   --yyyy/mm
   SELECT '112' ,CONVERT(VARCHAR(6),@myDate,112)
   SELECT '111' ,CONVERT(VARCHAR(7),@myDate,111)
   --yyyy
   SELECT '112' ,CONVERT(VARCHAR(4),@myDate,112)
   --yymm
   SELECT '12' ,CONVERT(VARCHAR(4),@myDate,12)
   --yy/mm
   SELECT '11' ,CONVERT(VARCHAR(5),@myDate,11)
   --mmdd
   SELECT '112' ,SUBSTRING(CONVERT(VARCHAR(8),@myDate,112),5,4)
   --mm/dd
   SELECT '101' ,CONVERT(VARCHAR(5),@myDate,101)
Insert時に新しく付与されたIDの取得方法(SQL Server)
IDENTITYプロパティ
SQL Serverに一意のIDを生成させる方法として、列にIDENTITYプロパティを指定する方法があります。 IDENTITYプロパティには次の特徴があります。
   * ひとつのテーブルのひとつの列にしか指定できません。
   * 指定する列のデータ型はint型、bigint型、smallint型、tinyint型、decimal型、numeric型に限ります。
   * (設定により変更可能ですが)基本的に値のセットは出来ません。
IDENTITYを指定した列に値を挿入したい場合は、IDENTITY_INSERTプロパティをONに設定します。 この設定は同一セッション内でのみ有効です。
BEGIN TRANSACTION SERIALIZABLE;
INSERT INTO …
SELECT SCOPE_IDENTITY();
COMMIT TRANSACTION;
IDENTITY列の番号リセット(SQL Server)
SQLServerで、Identity属性を使用して自動的に番号をセットしている項目があります。
この採番を1からやり直したい時
DBCC CHECKIDENT (tablename ,RESEED ,0)
にて変更可能です。
0の部分を戻したい値に変更する事も可能です。
SpamAssassinの導入(Debian wheezy)
SpamAssassinのインストール
# apt-get install spamassassin
設定ファイルを編集
# vi /etc/default/spamassassin
スパムフィルタを有効にするため、下記を変更して保存
ENABLED=1
SpamAssassin?を起動する
# /etc/init.d/spamassassin start
アフィリエイトに最適!
格安IP分散サーバーなら
【CIPレンタルサーバー】

クリエイターがたくさん使ってる、ロリポップ!
独自ドメインやデータベース、PHP・CGI・SSIはもちろん 大人気Wordpressなどの簡単インストールをはじめ、
カート機能、cron、SSH、共有/独自SSLなど機能満載。
メールアドレスはいくつでも作成可能!
容量最大1000GBで月額100円(税抜)から。